> For the complete documentation index, see [llms.txt](https://docs.optibase.io/llms.txt). Markdown versions of documentation pages are available by appending `.md` to page URLs; this page is available as [Markdown](https://docs.optibase.io/basics/installation-guide-adding-the-optibase-script.md).
# Installation Guide: Adding the Optibase Script
To enable A/B testing, Heatmaps, and Personalization, you must add the Optibase script to your website. This single snippet powers all features across your entire workspace.
#### Step 1: Locate Your Unique Script
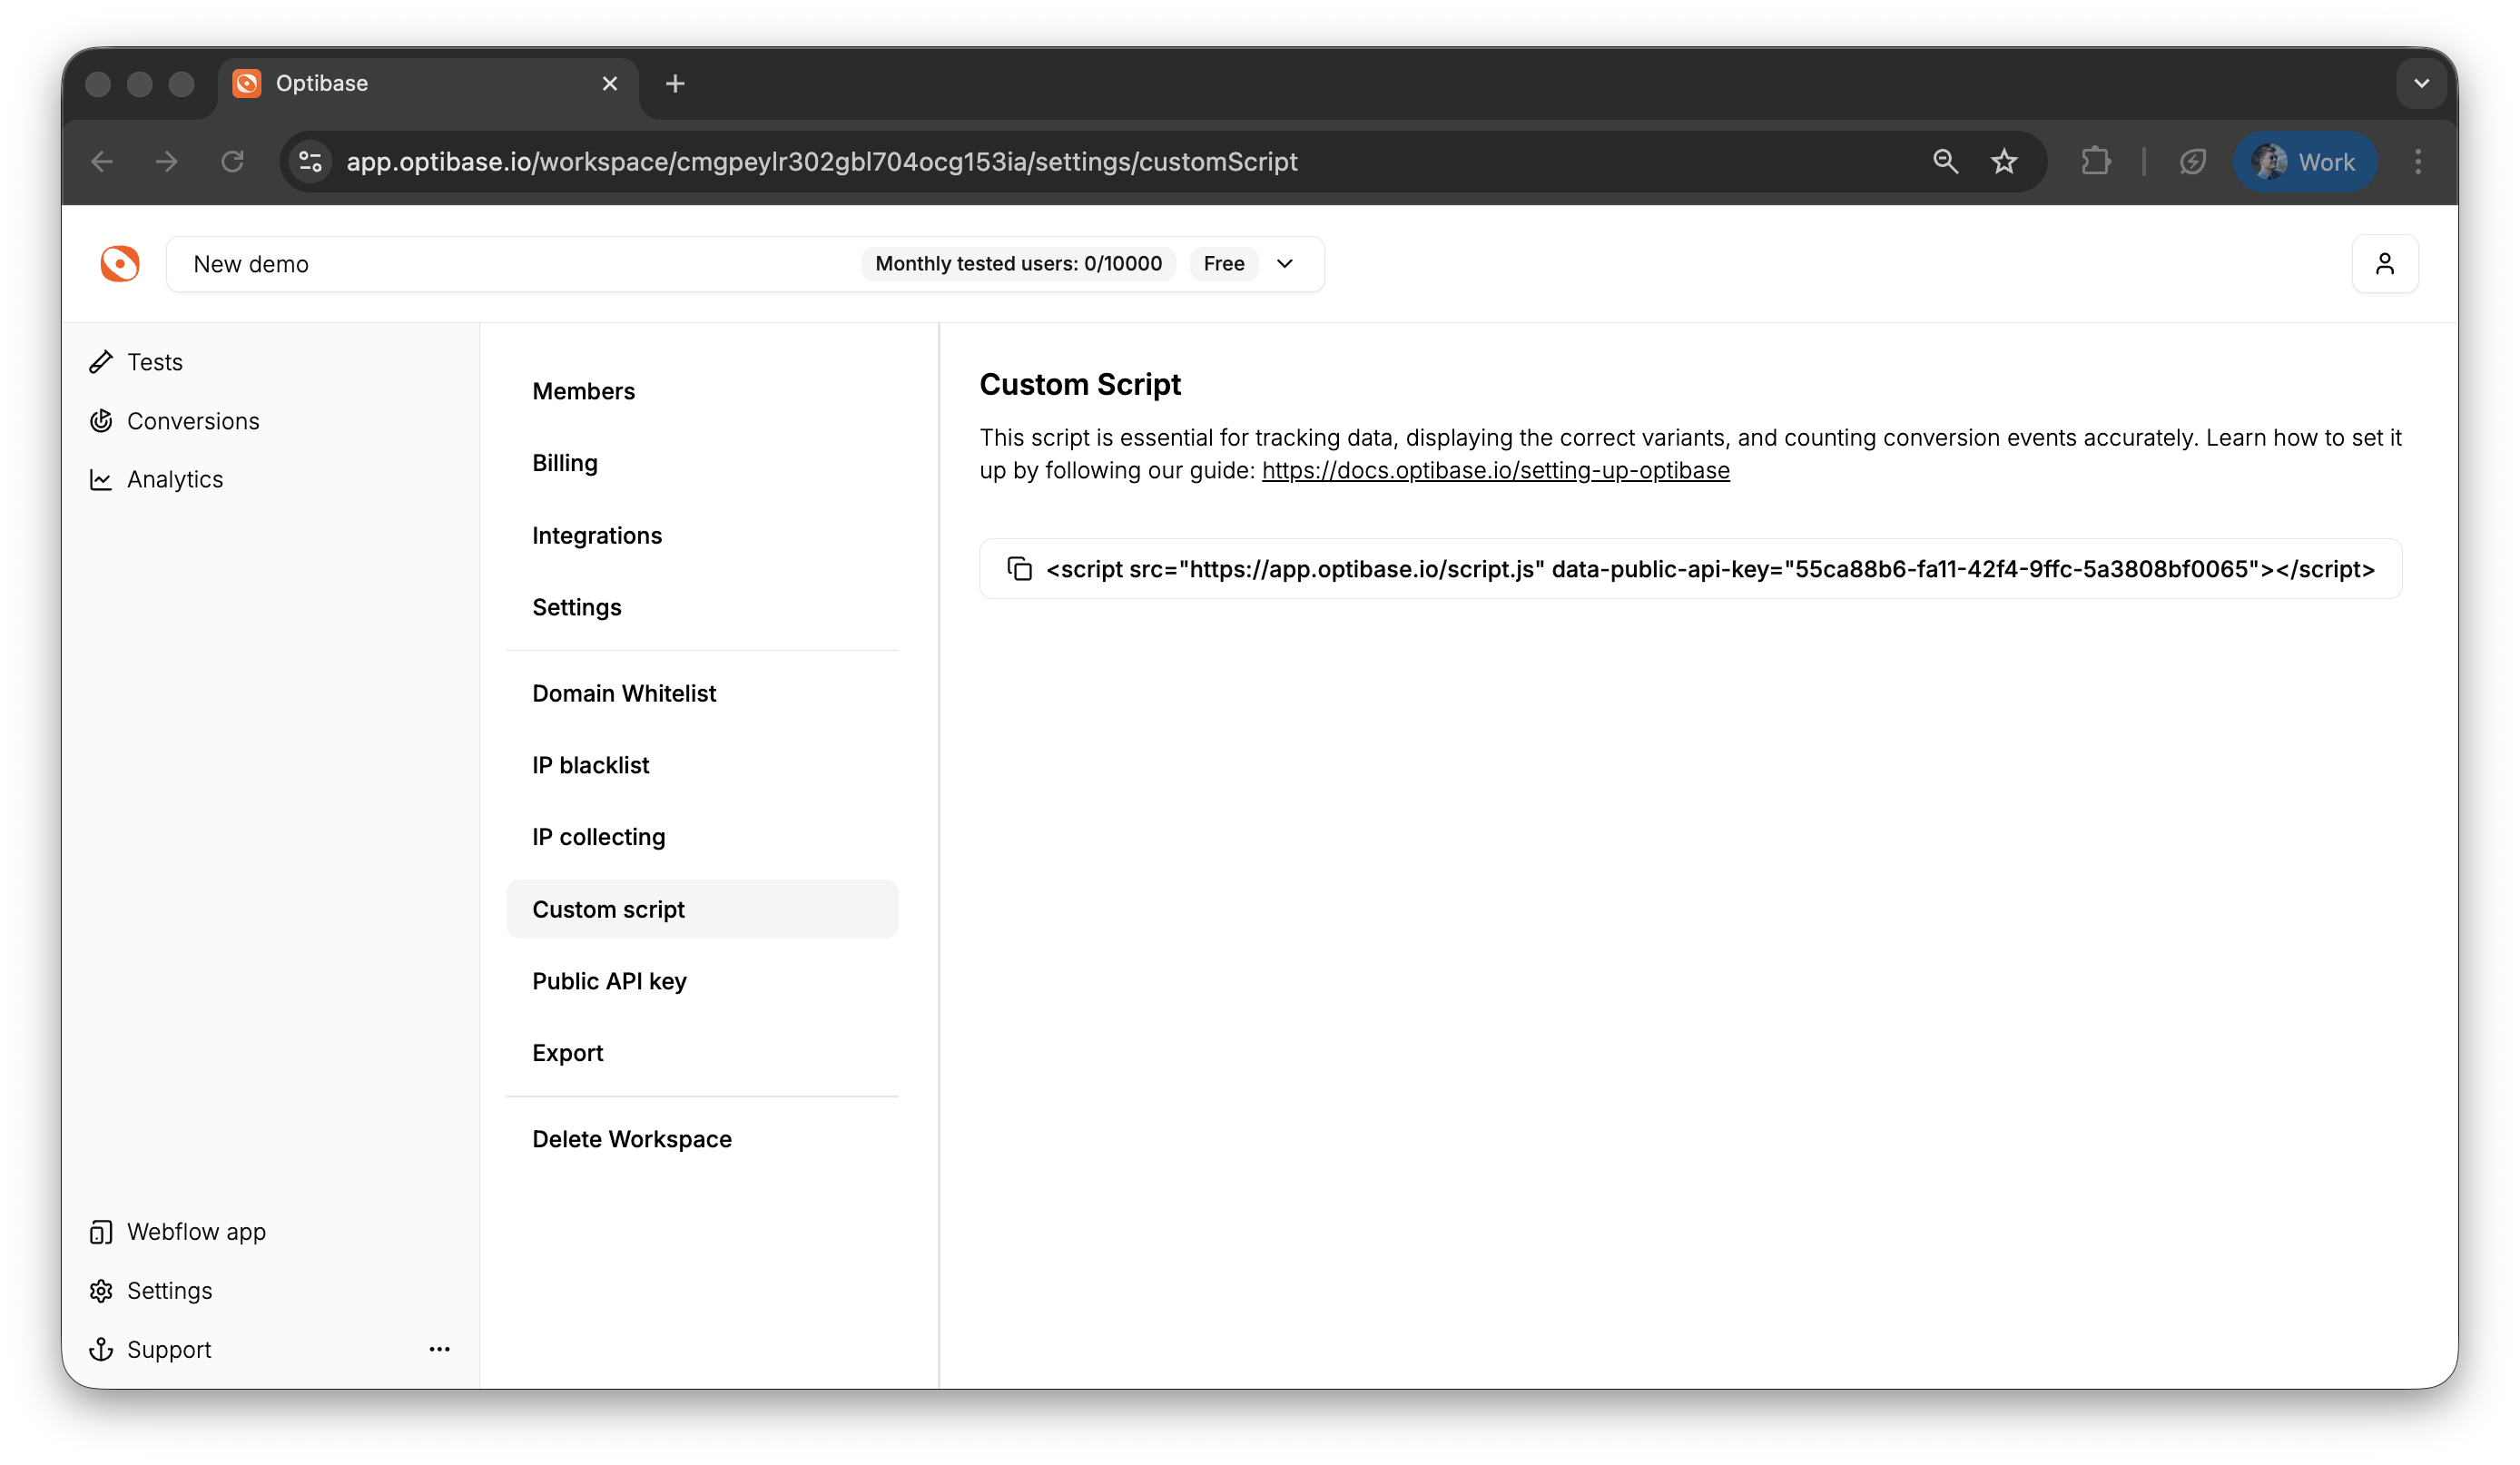
1. Log in to your account at [app.optibase.io](https://www.google.com/search?q=https://app.optibase.io).
2. Navigate to Workspace Settings in the sidebar.
3. Select the Custom Script tab.
4. Click on the code block to copy your unique snippet.
***
#### Step 2: Where to Place the Script
For Optibase to function correctly, the script must be placed inside the `` tag of your website.
Critical Requirement: You must place the script on every page where you want to run tests or track conversions. We recommend adding it to your global site settings.
**Recommended Placement:**
Paste the script as the very start of your `` tag.
HTML
```
...
...
```
***
#### Step 3: Platform Specific Instructions
**For Webflow Users**
1. Open your Project Settings.
2. Go to the Custom Code tab.
3. Paste your Optibase script into the Head Code section.
4. Publish your site to all domains.
**For WordPress Users**
1. Log in to your WordPress Dashboard.
2. Ensure you have the Optibase WordPress Plugin installed.
3. Navigate to the Optibase settings and paste your script ID
***
#### Why the `` placement is required
* Zero Flicker: Loading the script early ensures that variants are applied before the page renders. This prevents users from seeing the original version for a split second.
* Accurate Tracking: This allows Optibase to record page views and user sessions the moment the page begins to load.
* Split Test Support: Necessary for instantaneous URL redirects during split tests.